


 Solutions
  5 June 2014
IP-cameras in Smart Home
IP-cameras are a must in every Smart home. Customers naturally want to know that their house is safe and sound and what is going on in the house, when no one is in. Thus, any smart house or apartment is to have video-cameras. And if a house or an apartment is a large one, there are to be many video cameras. And that’s where a number of difficulties appear.
Firstly, video cameras can increase the total cost of the project. As software for smart homes doesn’t always make it possible to use inexpensive DVRs.
Secondly, not all software for smart homes can get and process video streams from numerous sources.
And thirdly, there is always a question, where to display the video from cameras for the customers to have quick and easy access to it.
All these difficulties are solved by iRidium software package. iRidium makes it possible:
- to use many types of video cameras and DVRs (iRidium supports H.264/mpeg4 formats, HTTP, RTSP protocols);
- to place up to 5-6 video cameras in one room or one zone;
- to display video stream on any smart phone or tablet, based on iOS, Android, OS X or Windows, that the customer uses to control Smart home.
How to set up IP-cameras in Smart home?
Let’s set up getting video stream in H.264 / mpeg4 formats from Axis 206W camera as an example.

1. Install iRidium Environment on your PC.
2. Open iRidium GUI Editor.
3. Create a new project (File / New Project) or use the hot key Ctrl + N.

In New Project window leave default parameters of the new project, press "ОК".
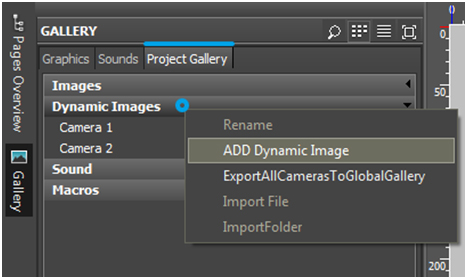
4. Open Galley panel and select Project Gallery.
Click on the Dynamic Images folder with the right mouse button. Select Add Dynamic Image in the drop out menu.
Dynamic Images in iRidium are stream video or snapshots, downloaded from the Internet or the local net.
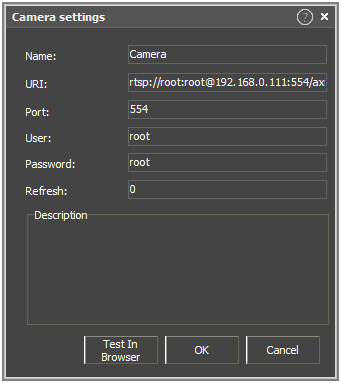
5. In Camera Settings window look at the URI field.
In iRidium video from IP-cameras (DVRs or any other source) is displayed only if there is a DIRECT LINK to the video stream. Enter direct link to the video stream into the URI field.
You can find direct links to the video stream of your IP-camera or DVR at a specialized web-site.
We found a link for AXIS 206W camera to a H.264 / mpeg4 stream via RTSP

Before copying the link to the URI field the word IPADDRESS has to be changed into IP address of the camera. In our case it is 192.168.0.111.
Now we copy the changed link into the URI field: rtsp://192.168.0.111:554/axis-media/media.amp?
The Port field automatically gets the value 554, as it is indicated in the link rtsp://192.168.0.111:554/axis-media/media.amp?
If you want only authorized access to your camera with a name and a password, fill in the fields User and Password. The standard user name and password are given in the camera manual. For our Axis 206W camera the standard user name and password are: root. After filling in User and Password fields, the URI field has changed and now it is:
rtsp://root:root@192.168.0.111:554/axis-media/media.amp?
6. Press "ок" in Camera Settings window.
Select the created dynamic image and drag-and-drop it on the open page in the workspace of the editor.
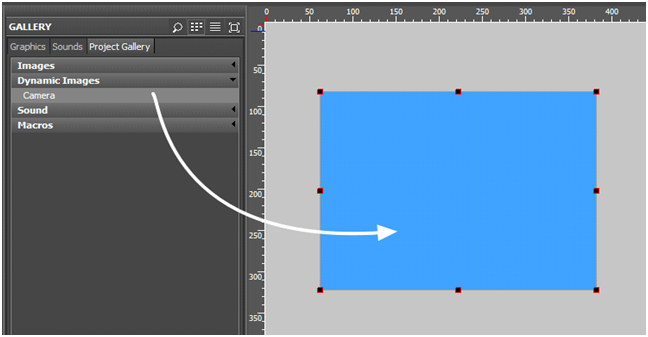
7. Launch Emulator by pressing the "Emulator" button in the tool bar. It launches the project and video is displayed on the graphic item.
You’ll find instructions how to set display of video from IP-cameras HERE.
Sample project with video settings can be downloaded HERE.